
Colourful chemistry. Beautiful science.
- sciencewithdianneislandba
- Apr 11, 2020
- 13 min read
Updated: May 3, 2020
Colourful science experiments can be loads of fun to play with. Chemists and artists have been inspiring each other for centuries.
Red Cabbage pH Science Experiment
This is an adult assisted science experiments due to using knives and boiling water
RED CABBAGE SCIENCE EXPERIMENT FOR KIDS CHEMISTRY
This isn’t the sweetest smelling science experiment, but once you get past the smell this cabbage science experiment is fascinating.
So don’t stop playing (learning) with your food!
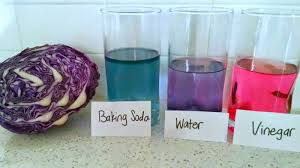
CABBAGE SCIENCE EXPERIMENT The pH scale is a fascinating scale that identifies how close something is to acid and how close it is to an alkaline material.
In this experiment, you will learn learn how cabbage can be used to test liquids of varying acid levels. Depending on the pH of the liquid, the cabbage turns various shades of pink, purple, or green! It’s incredibly cool to watch, and you'll love it! This is one of the most thrilling and satisfying ie pH indicator science experiment.
CABBAGE JUICE SCIENCE INGREDIENTS
Grab a head or two of red cabbage and let’s get started! Even if your kids swear they hate cabbage, they will be loving it (at least for science sake) after this awesome cabbage chemistry experiment.
Red cabbage
Several jars or small containers about the same size and shape (glass or clear plastic)
Lemons or citric acid (grab a few for a couple of extra science activities you will find below)
Baking soda
Vinegar
Other acids and bases to test (see more items to test below)
pH test strips (optional but older kids will enjoy the added activity)
METHOD
Make the liquid ahead of time.
Chop a cabbage into small pieces and add them to a pot of water. Put in enough water to fill all your containers about 1/3 of the way full.
Boil the water for about 10 minutes, then let the pot rest for another 30 minutes.
Drain the cabbage water and throw away the boiled cabbage. Use the cabbage water in the following way...
DISCUSSION
Discuss the concept of the pH scale. How can kids tell if something is an acid or a base?
Remember
Bases: Have a bitter taste. Feel slippery.
Acids: Have a sour taste. Feel rough. To know what pH something has, there is a pH scale. Pour a bit of the cabbage water into all of your containers. Fill them the rest of the way with water. Note: Overall, reactions are more dramatic and visible when the cabbage water is less concentrated.
Let the kids add the materials to the jars, then watch as the cabbage water reacts and changes colours. Test the actual pH of each jar with pH test strips if you have any or discuss which could be acid or alkaline and why. Apply the touch test if you can.
Science Questions to Ask
What is the pH scale?
Why is the pH of different foods different?
What makes the cabbage juice change colour?
The Science Behind the Cabbage pH Science Experiment for Kids
Why does cabbage work as a pH indicator? Red cabbage contains a pigment known as anthocyanin. Anthocyanin changes colour when it comes in contact with an acid or a base. Red colour changes mean that the pH is acidic. Green means it is a base.
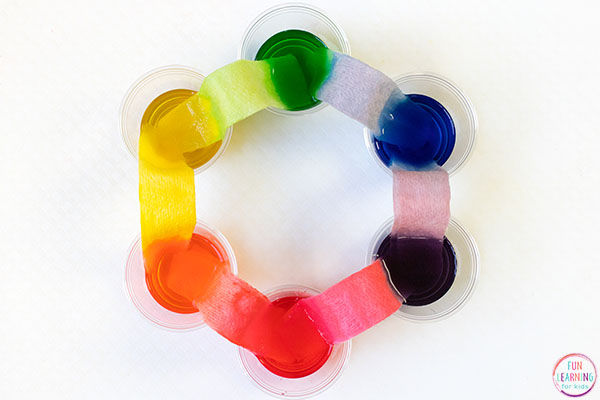
2.) Walking Water Science Experiment
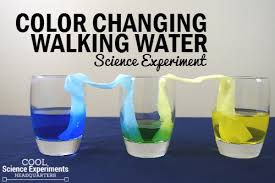
Walking water science experiments are so much fun and super easy to do! This rainbow activity is perfect for autumn science!
It's fun to see how quickly the water traveled up the paper towel and neat it was to watch the colours mix together, and you can start seeing results right away! You only need a few simple supplies that you probably already have around the house.
Setting Up the Rainbow Science Experiment
Supplies Needed:
Printable walking water recording sheets (button to download at the bottom of the post)
Small plastic cups or glasses
Paper towels (*read my tips below for picking the right ones)
Food colouring in primary colours
Water
* The pick-a-size paper towels are best because then you just use half sheets for each cup. If you only have full sheets, then cut them in half. I’ve also heard that more absorbent paper towels work better too. I buy the cheap store brand ones, and our water moved pretty quickly from cup to cup, so I am not sure how important that is. It may have went quicker with something more absorbent though.
1. Print out the recording sheets and make copies, if needed.
2. Place 7 cups in a row and pour water in the 1st, 3rd, 5th, and 7th cup. My cups were about 3/4 full. I have since heard that fuller is better.
3. Add 5 drops of red food colouring to the 1st cup and the 7th cup.
4. Add 5 drops of yellow food colouring to the 3rd cup.
5. Add 5 drops of blue food colouring to the 5th cup. Doing the Walking Water Experiment
You want to try to use the same amount of food coloring in each cup. When I did this with my kids they did drop an extra one or two in since they can’t control it well, but I just added a drop or two more to the others to even it out.
6. Take a half sheet of paper towel and fold it in half lengthwise and in half again lengthwise.
7. Trim off some of the length so that there isn’t too much excess paper towel that will stick up in the air between each cup. This will make the water walk more quickly.
8. Place one half of a rolled paper towel in the 1st cup and place the other half in the cup next to it. Then another paper towel from 2nd cup and into the 3rd cup. This continues until you have placed the last paper towel that drapes over from the 6th cup to the 7th cup.
9. Stare at the cups and watch what starts happening. You should quickly be able to see the colored water begin to crawl up the paper towel.
10. Don’t forget to do the first part of the recording sheet. Students will predict what they think will happen.
his walking water experiment is AWESOME!
Keep checking back every couple of minutes. Soon you will be able to see that the water has crawled all the way up the paper towel and is beginning to walk back down into the empty cup next to it.
Since the cup on either side of an empty cup has coloured water in it, the two colours begin to mix in the empty cup. So cool!
Keep coming back throughout the two hours or soon and observe what is happening.

Question to Ask
What do you think will happen to the water?
What is happening now?
Why do you think the colours are changing?
Why might the water be able to move up against gravity like that?
How this Science Experiment Works
The water moves up the paper towels through a process called capillary action. The paper towel is made from fibres and the water is able to travel through the gaps in the fibres. The gaps in the paper towel act like capillary tubes and pull the water upward. This is what helps water climb from a plant’s roots to the leaves at the top of the plant or tree.
The water is able to move upward against gravity because of the attractive forces between the water and the fibres in the paper towel.
3.) Exciting Magic Milk Science Experiment for Kids
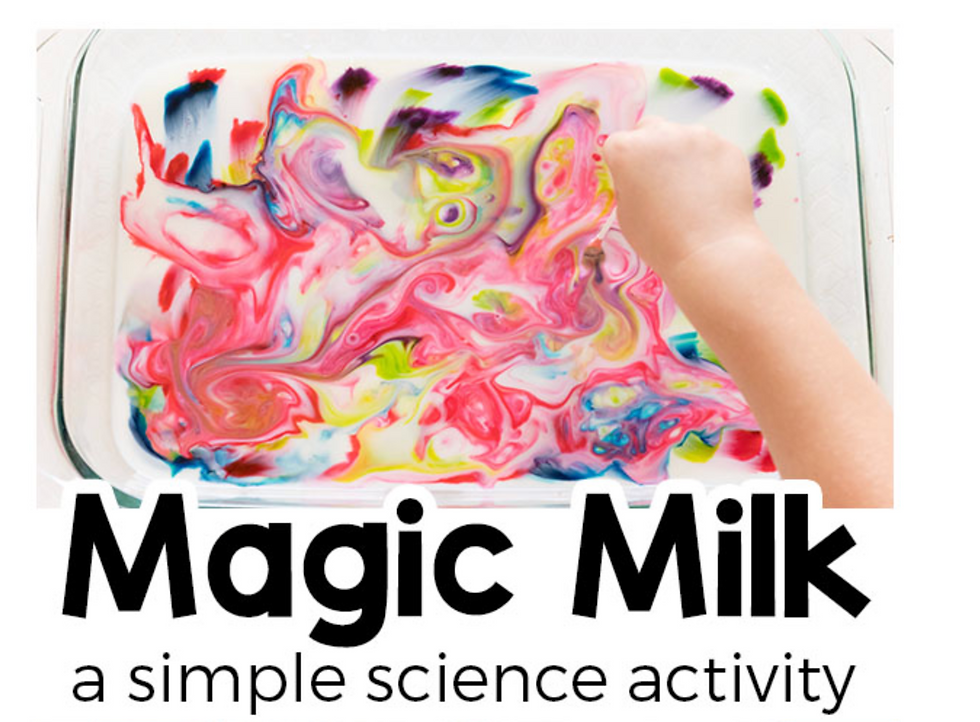
This science experiment only takes me a couple of minutes to set up. Kids love it.
You most probably will already have all of the supplies in your home, and I will show you how simple this is to do it.
Magic Milk Science Experiment
To set up the magic milk science experiment, you only need to grab a few supplies.
Affiliate links below.
Milk
Liquid food colouring – gel doesn’t work well
That’s all you need! I bet you have most of them already.
It’s also super simple to set up.
Pour a thin layer of milk in a shallow pan.
2. Add drops of food colouring ring all around the milk.
3. Put the cotton swab in the milk – pressing it down in one spot and holding it there for about 15 seconds.
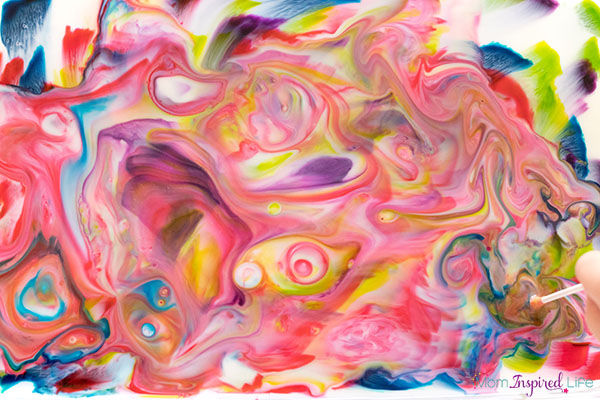
Expand on the Magic Milk Experiment
Try the magic milk experiment with 1%, 2% and whole milk. Observe what happens and keep a record of how the milk behaves with each type of milk. Did you notice a difference?
If you do this with water will the colours still move all around as they did in the milk?
4.) Super Cool Lava Lamp Experiment for Kids
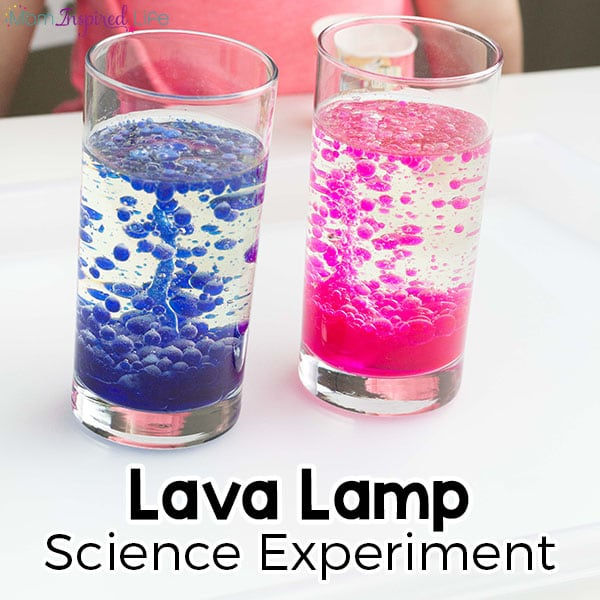
The great thing about this science experiment is that you only need a few supplies and you're probably already have most of them in your home.
*Disclaimer: Adult supervision is required for this experiment. You must supervise your children at all times while doing it.
Lava Lamp Experiment Supplies Needed:
Vegetable Oil
Water
Food colouring – primary colours or neon
Original Alka Seltzer tablets
To begin, colour about 1/2 cup of water with food colouring. I like using these gel food colours for vibrant colouring. Take the Alka Seltzer tablets and break them into 2 or 3 pieces. Place them in a small cup or container.
Fill a glass about 3/4 full with vegetable oil. Then pour in the coloured water until the liquid in the cup is about 1-2 inches from the top. You don’t want it to overflow! Well, unless you want to turn it into an eruption experiment too. For this reason and quick cleanup, I like to do this on a tray. Let the children take turns adding a piece of an Alka Seltzer table to the cup. *DO NOT let them put the tablet in their mouth at any time. Why this Science Experiment Works The water and oil do not mix and the oil doesn’t change colour because the food colouring is water soluble. The Alka Seltzer reacts with the water to make bubbles of carbon dioxide. The bubbles attach themselves to the blobs of coloured water and bring them to the top of the glass. When the bubbles pop the blobs of coloured water fall back to the bottom of the glass. This lava science experiment is sure to WOW your kids. They may even ask you to do it over and over again like mine did! ADULT SUPERVISION REQUIRED Adult supervision is required for all activities
5.) Changing flower colours experiment
Colour changing flowers science experiment for kids is such a fun science project. They look so pretty too! This cool science experiment is really easy to set up and the flowers change colour quite quickly (within about an hour) so there isn't too long to wait to see the change.

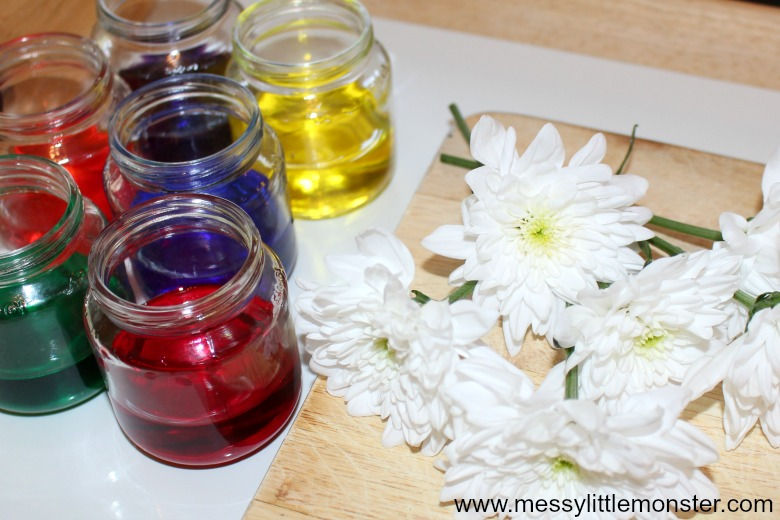
Supplies needed for the colour changing flowers science experiment
White flowers
Glass jars (we used baby food jars)
Scissors
Liquid water colour or food colouring
Water
The best flowers to use for the colour changing flower experiment?
You can use any white flowers for this colour changing flower experiment, we used large white daisies, but you could use white roses or carnations. The important thing is to use white flowers so that you can see the colour changes clearly.
Make sure that you cut the stems diagonally across the bottom so they can drink up the coloured water easily. It is also important to make sure that the flowers are fresh, this colour changing flowers experiment won't work so well if the flowers are beginning to wilt.
It would be fun to try out a selection of different white flowers to see which work best.
How to set up the colour changing flowers experiment
STEP 1: Get your supplies ready for the flower experiment and predict what will happen
Before beginning this fun science experiment it is important to make sure that you have all your supplies ready and to hand. If you are planning to make this an experiment for preschoolers this is extra important as their attention span is shorter than that of older children.
Ask your child to draw a picture of what they predict will happen.
STEP 2: Fill glass jars with coloured water
Pour water about half way in each of the glass jars and then add a few drops of liquid water colour (or food colouring) to each jar. The more colouring you add the deeper the colour on the flower petals will be. To get brightly coloured flowers like those in the images we added 10 drops of liquid watercolour to each jar of water.
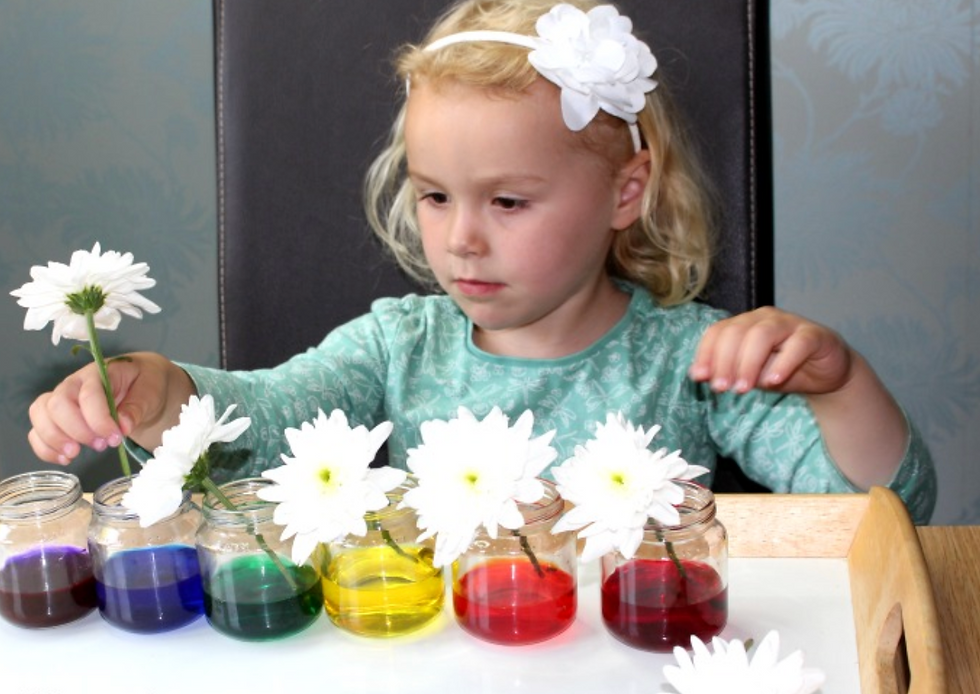
STEP 3: Prepare the flowers
To prepare the flowers for this colour changing flowers experiment you will need to cut them so that they are slightly taller than the jars that you are using. You will need to cut the bottom of each flower with a diagonal cut so that the flower can easily drink the coloured water. Make sure (as mentioned above) that you use fresh white flowers so that you can see the full colour changing effect.
STEP 4: Place the flowers into the coloured water
Place one flower into each jar of coloured water (or more if you want!) and then watch as the flowers change colour.
How long does it take to change the colour of a flower with food colouring or liquid watercolour?
The flowers won't change colour instantly, but after an hour or so you will start to see a little colour appearing on the petals. After a few hours the petals will all begin changing colour and if you leave the flowers in the coloured water overnight the colour will continue to get deeper. The flowers in the images below were left overnight.
The science behind the colour changing flowers science experiment.
This easy science experiment. The coloured water used in this experiment demonstrates how water is sucked up through a plants stem and then makes its way to the different parts of the plant including the flower. This fun experiment is a perfect beginners science experiment for children who want to learn about how flowers absorb water.
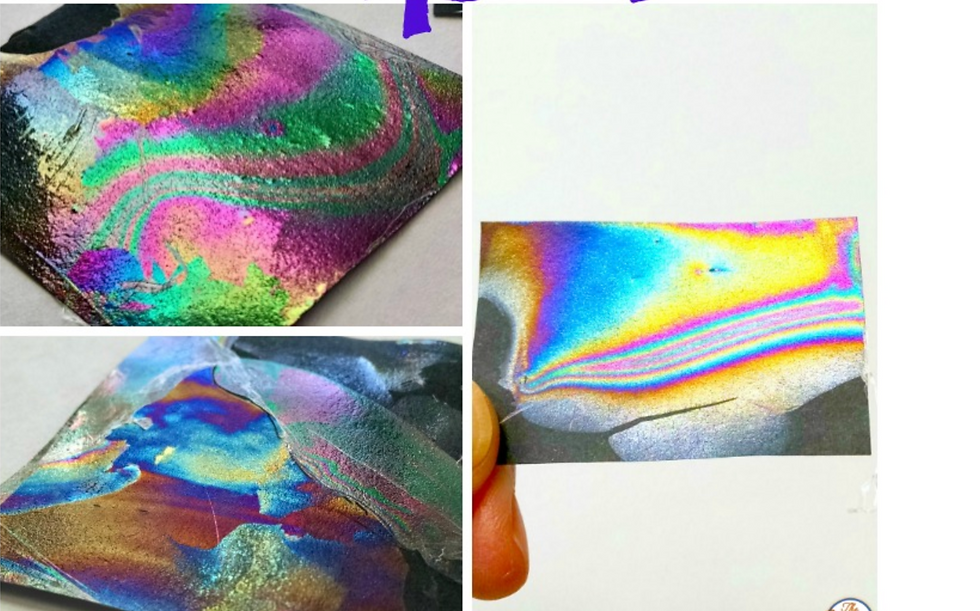
6.) Rainbow Paper

Rainbows are one of the most beautiful natural wonders and can teach us so much about colour science for kids. After this five minute science activity everyone will walk away with their own magnificent rainbow paper that can be enjoyed year-round, rain or shine.
To make rainbow paper gather a few quick supplies:
A bowl filled with water
Rectangles of black construction paper or black card stock (about 3-5 inches long on the sides)
Paper towels
The rainbow paper experiment is simple, but it does take some patience to get it just right. We aware that although you make dozens of pieces of rainbow paper, about half of them will turn out how you want them.
Some people may feel concern about the fumes nail polish creates. I suggest doing this experiment in a ventilated area with good air circulation. The exposure to nail polish is so brief that it shouldn’t cause any problems, but if you have a child that is especially sensitive to strong smells it may be best to either do this experiment outside or skip it altogether.
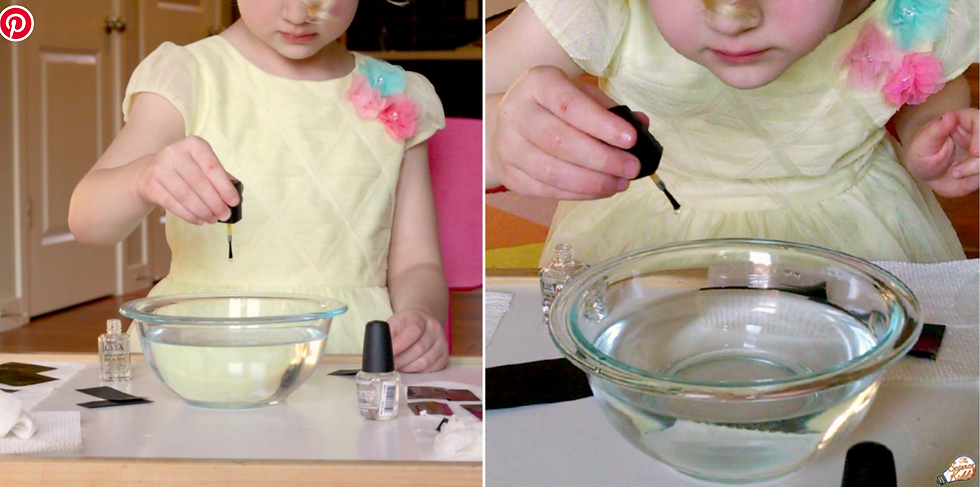
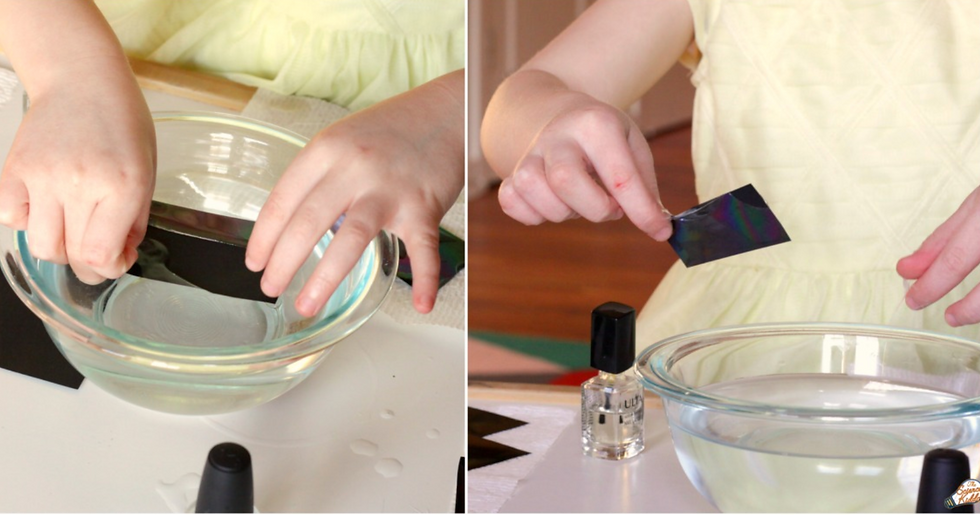
How to Make Rainbow Paper
All you do is drip one little drop of nail polish into the bowl of water. Waited for a couple of seconds and then dip a piece of black paper into the water and pulled it out again. That’s it!
The nail polish dries quickly on the surface of the water, which creates a film that won’t stick to the paper. To do this activity successfully it needs to be done quickly. Be sure to dip the paper into the water within 10-15 seconds after the drop of nail polish goes in.
If the nail polish does create a dry film on top, simply scoop it off and try again more quickly!
We did this experiment several times with several pieces of paper. It was fascinating to see how each piece came out so differently! Once the paper is dry (this only takes a few minutes) tilt the paper in different directions to see the rainbow patterns appear. Hold it next to a sunny window for best results!
The colours of the rainbow vary with the thickness of the nail polish on the paper. This is why each piece of rainbow paper is varied and unique!
This is the same effect you will see when oil mixes with water on the road on rainy days. Thin film interference is also visible on the surface of soap bubbles at just the right angle to the light.
The colours of the rainbow vary with the thickness of the nail polish on the paper. This is why each piece of rainbow paper is varied and unique! This is the same effect you will see when oil mixes with water on the road on rainy days. Thin film interference is also visible on the surface of soap bubbles at just the right angle to the light. Try to find each of the following colours on your rainbow paper: red, orange, yellow, green, blue, indigo, and violet!
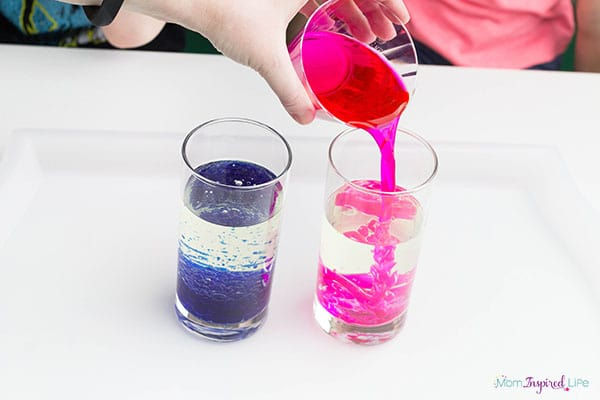
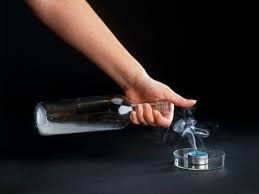
7. Colour Changing Water Experiment

Mixing two colours together to create a different colour has a certain wow factor. This experiment takes the excitement up a notch because the colours aren’t mixed together, but the same colour changing effect is achieved.
Try this experiment at home kids and watch their eyes light up as you pour the liquid into the bowl and “create” a new colour.
Enjoy!
Supplies Needed
Clear Drinking Glass
Large Clear Bowl
Pitcher
Water
Blue and Yellow Food Colouring
Step 1 – Pour water into an empty glass until it is 3/4 of the way full
Step 2 – Add 1-2 drops of blue food colouring to the water and stir until combined.
Step 3 – Fill a pitcher full of water. Add 7-10 drops of yellow food colouring to the water and stir until combined.
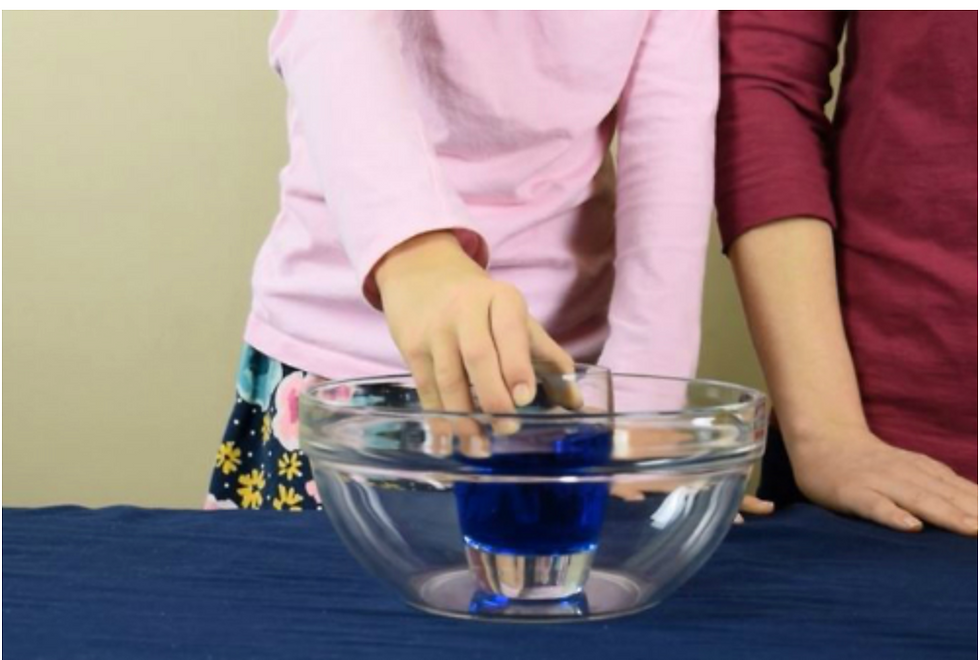
Step 4 – Get a large empty bowl and place the glass with the blue water in the centre of the bowl.

Step 5 –Next, pour the yellow water from the pitcher into the bowl. Be careful not to get any water into the glass. Step 6 –What do you see when you look through the bowl? Is the water in the bowl yellow? What about the water in the glass? Why is some of the water green?
.
How Does the Experiment Work?
When you look through two colours at once, the colours “mix” together similar to how they would if you put two dots of different colours on top of one another. Because we used two primary colours in this experiment (yellow and blue), when we looked through the bowl they “combined” to form a secondary colour (green).
You can also try the experiment with the following colours:
Red + Yellow = Orange Red + Blue = Purple
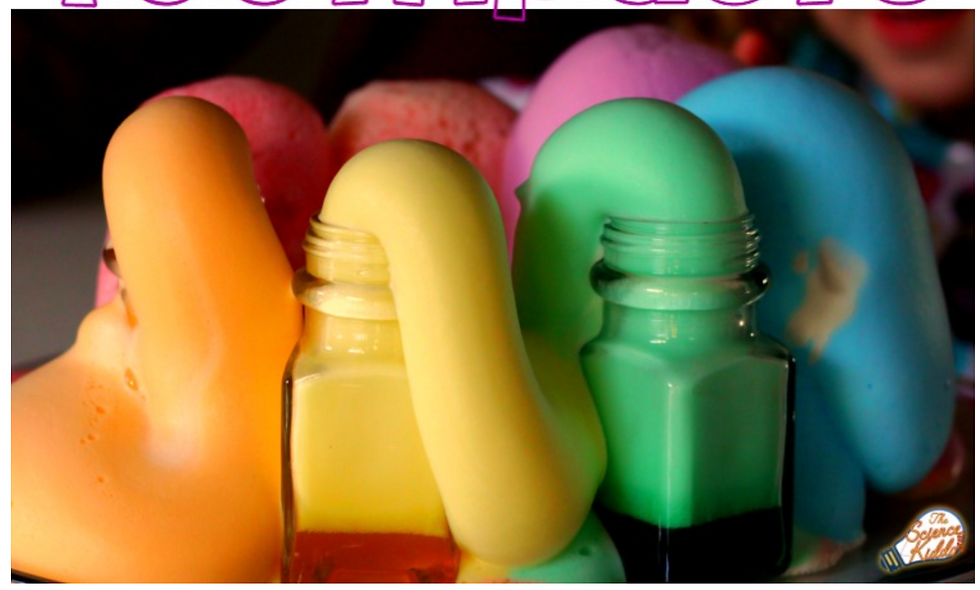
8. Rainbow Coloured Toothpaste
A Note About Safety I have outlined a few safety precautions in the instructions below. Just be careful and tell your children about the real hazards of using hydrogen peroxide.However, don’t let the safety warnings keep you from sharing this awesome rainbow science experiment with the kids! If you are really worried you could always have the kids wear eye protection and gloves to keep them extra safe!
An adult should definitely handle the hydrogen peroxide since it can cause skin irritation and bleach hair and clothes. Use your own best judgement with your kids. If they can’t be trusted to keep their hands and mouths away from the hydrogen peroxide perhaps it's best to avoid doing this experiment.
If hydrogen peroxide does come in contact with skin or eyes, flush the area with water immediately. And if a child actually ingests hydrogen peroxide, call Poison Control.
Gather your ingredients first.
To do this rainbow science experiment you will need a higher grade of hydrogen peroxide which you can purchase from the chemist.
Empty spice jars or salt shakers (I had 7 on hand, but you could do more or less, depending on what you have!)
Baking dish
6% Hydrogen peroxide (20 volume clear developer) –
Food colouring
Liquid dish soap
Dry active yeast
Lukewarm water
Measuring spoons and cups
Funnel
Wooden skewers
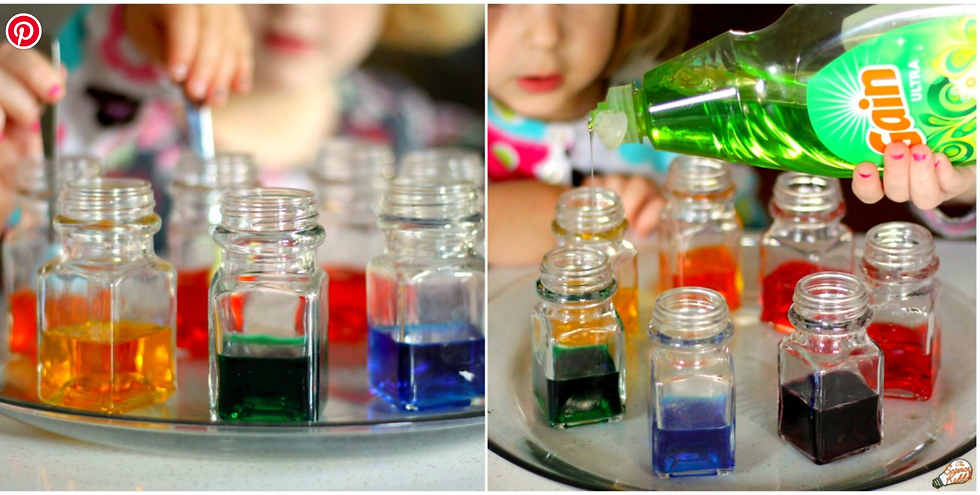
Arrange the empty spice jars in a circle on a large serving plate. Making unicorn toothpaste makes a mess so it’s good to have a dish or baking sheet to catch most of it!
Creating an Exploding Rainbow
Into each spice jar I added 2 tablespoons hydrogen peroxide, a few drops of food colouring, and a small squeeze of liquid dish soap. Since we wanted to make a rainbow we made the jars red, orange, yellow, green, blue, violet, and pink!
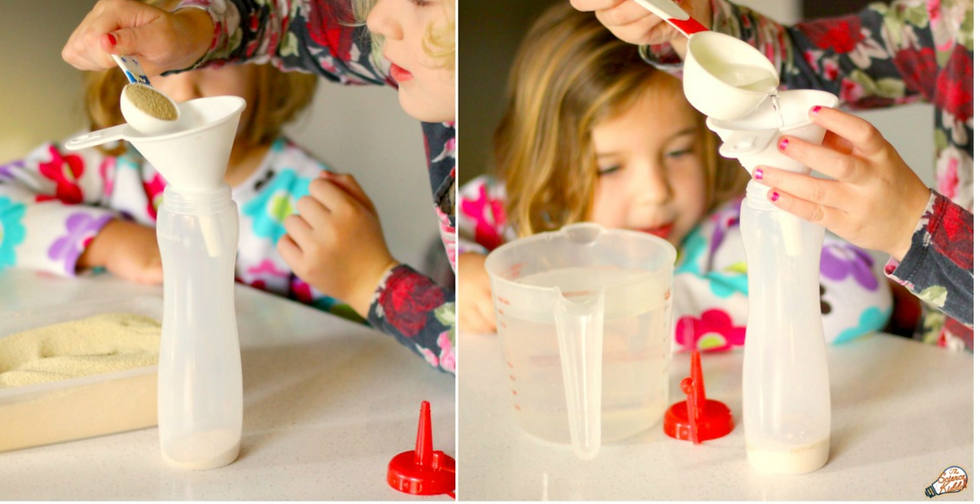
The next step.
Use a funnel to add yeast and water to a couple of condiment squeeze bottles. You want to use a 1:6 ratio of yeast to water. After that add the 2 tablespoons of yeast and 3/4 cup lukewarm water to each bottle, then use a wooden skewer to mix up the yeast mixture. Wait a few minutes to let the yeast dissolve a little bit.
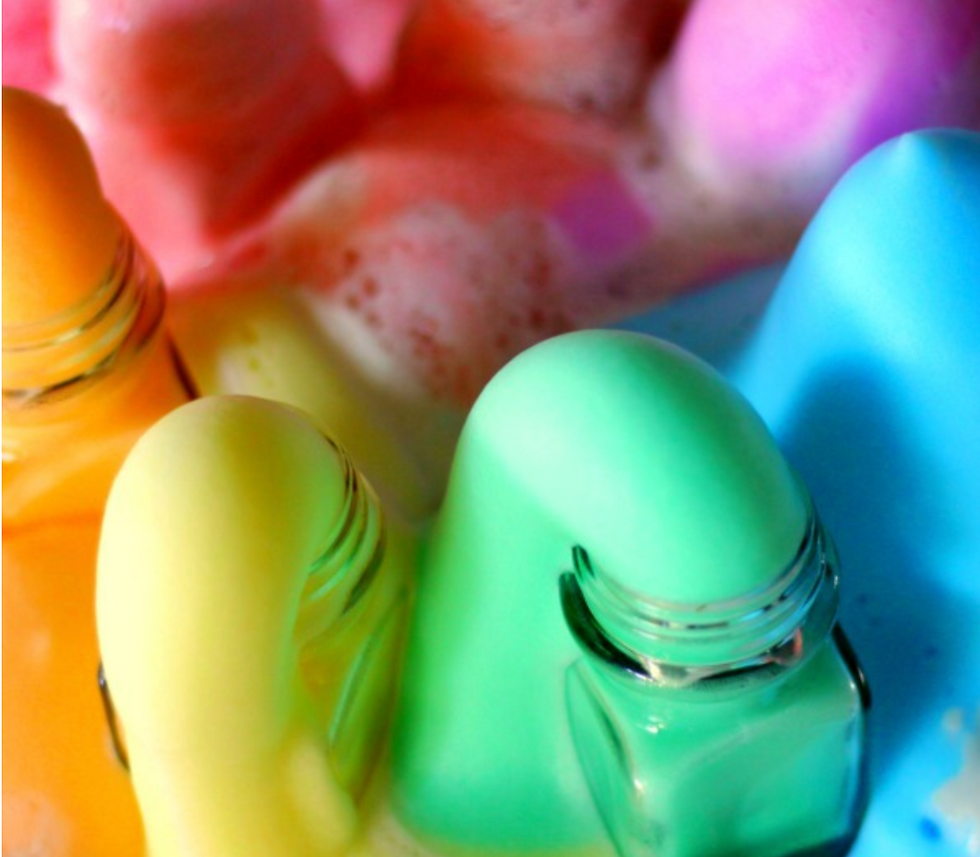
Finally - the REALLY fun part!
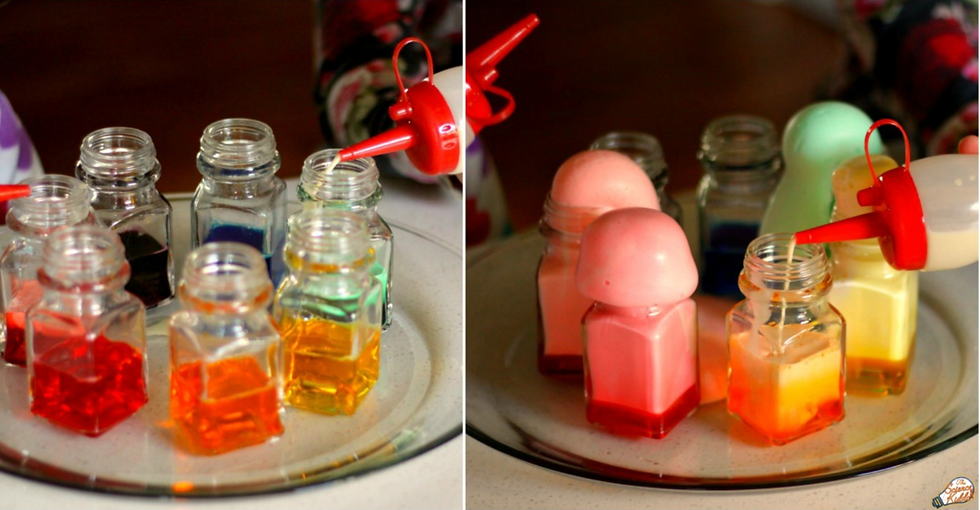
Kids to take turns at squeezing the yeast mixture into each of the colourful jars. They will erupt one by one, in a brilliant, foamy mess!
Comments